Feeds:
Posts
Comments

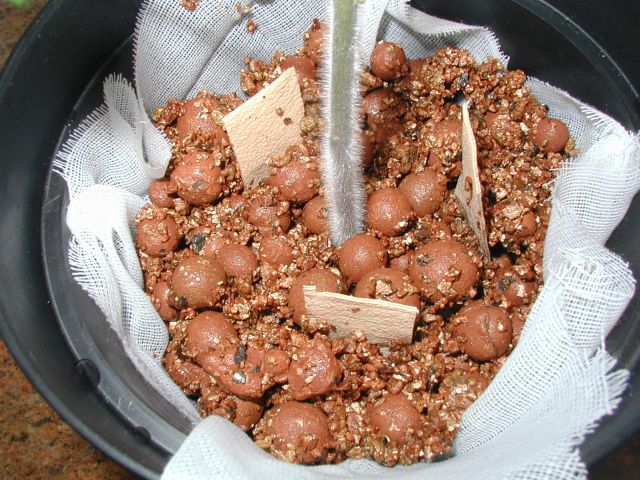
Using the same ‘dip and lift’ propagation method I tested in late 2007 (see my “Hobby Hydroponics – Tips on propagating lettuce” post), I grew some more ‘Four Seasons 3801’ loose leaf lettuces starting on 13th July 2008.

Here’s the seedlings in late July just before moving them into the mini hybrid float system:

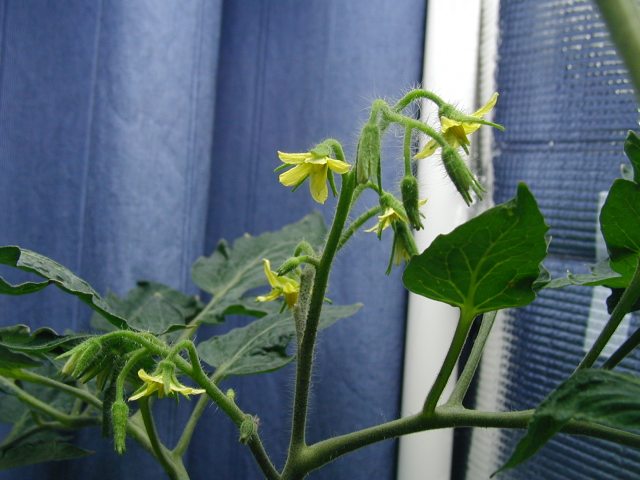
As you can see in the above photo I also tried to grow some A-Choy (aka You Mai Cai, Yu Mai Tsai & ‘A’ Veggie!) but the seeds didn’t germinate. I ended up testing their germination rate using many seeds and found that none were viable but I’ve since bought some new seeds from a local seed company and am confident that the new ones will germinate.

Here are the leaf lettuce seedlings in the mini hybrid float system, and just under a week later before they were moved into my new DIY Deep Water Culture (DWC) system:


Continue Reading »

Spearmint + the Eden Project

Apart from harvesting basil as mentioned in my previous post, I also had to move my three spearmint plants into a system that provided them with sufficient nutrient solution before going to the UK for two weeks. Up until then each plant used a 500g yoghurt cup.

I’d purchased a couple of polypropylene CD/DVD storage boxes (43L x 17W x 14D cm) for later use as nutrient solution containers in a deep water culture (DWC) system and used one of these with the spearmint plants.

The container was put on my kitchen’s window sill and the plants were placed inside in their existing yoghurt cup wick systems. Some holes were added close to the base of each yoghurt cup so nutrient solution in the container could reach the wicks and roots inside the cups. I then covered the top of the container with a piece of metallized plastic film (previously a bag from a breakfast cereal packet) to reduce evaporation. Continue Reading »

Before going on a trip to the UK at the end of May I harvested my basil plants. Here’s a photo showing the two plants (on the right) just before harvesting:

I did have a bit of a pest problem at the time. Small black flies about two millimetres long seemed to be laying eggs on the plants’ stems (edit: those “eggs” may actually have been sap excreted from the plants as a reaction to insect bites). This didn’t seem to have much of an impact on the plants but the flies were annoying.

Recently I’ve started to use a homemade yellow sticky trap, actually a yellow piece of card folded in half and hung just above a small tray of vegetable oil. This works quite well in catching the small black flies.

Basil leaves had been picked a few times to use in cooking but as I usually buy an off-the-shelf brand of Italian made tomato sauce with basil, I don’t use fresh basil that often. I guess I should start eating bruschetta and try making my own pesto sauce! Continue Reading »

This post is about my previous crop of mini roma and cherry tomatoes. My November Update posted in early December was the last time I wrote about them so I’ll now write about how they turned out.

I let both varieties grow for about 8 months from sowing their seeds in August and September 2007 until harvesting the last of their tomatoes in April and May 2008.

Here are photos of the flowering mini roma plants (left) and cherry tomato plants (right) taken on 13th December:

Unfortunately on this same day I noticed that the few small green roma tomatoes that had been growing on one of the three plants had started to develop slightly darkened areas containing some blackish spots on their bases i.e. the stigma ends. After web searching I discovered that the tomatoes had Blossom End Rot (BER) and once they show signs of this physiological disorder they have to be discarded. Apparently it is a symptom of calcium deficiency. Continue Reading »

Compared to how I’d previously propagated lettuce, I tried a different method in December with much better results.

The upshot is that sub-irrigation for propagation rules! That shouldn’t have been a revelation at all to me as there is sufficient info on the web that demonstrates it’s successful use. I’d even read some of it but hey, we reinvent the wheel all the time 😛

Sub-irrigation to germinate lettuce seeds is done automatically in medium to large scale setups, mostly using ebb and flow (aka flood and drain or ebb and flood) systems that incorporate water pumps controlled by electric timers. However a small-scale setup can be sub-irrigated manually.

‘My’ method is to ‘dip and lift’ i.e. I remove each pot from the propagator and dip them into a small, shallow tray filled with nutrient solution for a few seconds before placing them back into the propagator. This is done twice a day, no excuses! If possible as transplanting nears, repeating this process more often would benefit the seedlings but earning a living usually precludes this!

Inside the propagator the pots are suspended in a plug tray so that roots can grow out of holes in the bottom of the pots.

For the growing medium I used a mix of mostly Coir with some small grade LECA.

propagating_lettuces_in_1st_week_of_dec_2007.jpg

propagating_lettuces_2007-12-11.jpg

“Got some real nice lettuces there” I can imagine someone with a southern US twang saying! At least they were my best to date 🙂

Continue Reading »

Here’s a wrap-up of a few things that happened in my high-rise hydroponic hobby challenge in November.

basil_plants_on_2007-11-23.jpg

The basil plants have been doing well in their new, two part pots. The top part has holes in it’s base where wicks and/or roots can pass through and the bottom part is basically a reservoir for the nutrient solution. This allows the plant to be sub-irrigated.

It would be nice if the capacity of the reservoir was greater as I’m having to top-up the solution at least once a week.

Below are photos of one of the basil plant’s growing medium (LECA and vermiculite) before and after flushing with water:

growing_medium_with_salt_residue.jpg

growing_medium_after_flushing_with_tap_water.jpg

The greyish-white coating which you can see on the LECA balls in the lefthand photo is not mould but salt which accumulates as the nutrient solution evaporates. Every couple of weeks this needs to be flushed away with water otherwise the salt can build-up to a level which can damage the plant.

I’ve since pinched off the tip of both basil plants to encourage them to become bushier.

The mini roma tomato plants were doing okay in November but not so with the cherry tomato plants. All of their leaves were curling downwards around the edges and some were also becoming dry and brittle.

I searched the web, looking at photos and descriptions of tomato problems and none seemed to fit except for possibly one, damage caused by herbicides! Continue Reading »

Lighting support frame

For a couple of evenings I hadn’t switched on my two 65W CFLs as the tomato plants had grown taller than the bottom of the lights and the makeshift lighting support was precarious enough already without trying to raise it any higher. Actually, a few weeks ago it had toppled over and I was very lucky that no plant stems had been damaged! Therefore on Sunday 28th October I bought the materials needed to make a proper lighting support frame.

The remainder of Sunday and Monday evening was used to build the frame and on Tuesday evening I installed it. I’d triple-checked the dimensions and had paid particular attention to the width of the frame, as that is the tightest fitting part when it’s sitting in the bay window, so no problems were encountered.

PVC plumbing pipe and fittings were used to make the frame. The pipe’s diameter is 25 mm and the fittings include eight 90 degree elbows and eight T’s. The elbow and T fittings are joined together using 50 mm long pieces of pipe.

parts_of_lighting_support_frame.jpg

Although you can’t see it very clearly in this photo, a 30 cm long ruler rests on top of the pipes to provide scale. A can of PVC solvent cement is also shown but as the dry fitted joints were nice and tight, I haven’t yet bothered to glue everything together.

Cutting the correct length pieces from the PVC pipe with a hacksaw and cleaning the ends with a file and sandpaper were the most tedious parts of the job, although I’d made a small jig from a few scrap pieces of wood to help hold the pipe and this made it easier to cut. Continue Reading »

On 22nd October the cherry tomato plants were transplanted. Although more than ready, I hadn’t moved them earlier as I didn’t have any supports for their final (net) pots.

The black net pots have a diameter of 14 cm and I ended up buying some taller, brown plastic pots of the same diameter to act as supports.

When a brown pot is holding a net pot there is a 4.5 cm gap underneath the net pot. With the brown pots placed into a reservoir partially filled with nutrient solution, wicks hanging from the base of the net pots transport the nutrient using capillary action to the growing medium and plant roots.

These three photos show the final transplantation of a cherry tomato plant into a net pot:

transplanting_cherry_tomato_plant_into_net_pot.jpggrowing_medium_added_to_net_pot_w_cherry_tomato_plant.jpgcherry_tomato_plants_net_pot_w_wicks_and_holding_pot.jpg

As in the 1st wick system, 2 cm wide strips of Scotch-Brite ‘Window Cloth’ are used as wicks and a piece of filter bag is used to stop the growing medium from falling through the holes in the pot.

Continue Reading »

The backup plan that I mentioned in my Capillary mat and propagation changes post had to be put into action i.e. the conversion of the capillary mat system into a wick system.

Here’s a photo taken on 6th October, before the conversion:

plants_under_fluoros_on_2007-10-06.jpg

The four mini roma tomato plants were first propagated on 2nd August, whereas the three cherry tomato plants (I discarded the fourth one as it was too weak) were first propagated on 11th September. Since the above photo was taken the cherry tomato plants have continued to grow fast, unlike the mini romas.

Differences in the natural growth rates of these two varieties of tomato plants may fully explain this situation but I believe the difference in the uptake of nutrient solution is also important.

The mini roma plants had almost exclusively been sub-irrigated using the capillary mat and were only flushed with tap water to leech accumulated salt from the growing medium, once every two to three weeks.

The cherry tomato plants in their intermediate pots have been surface irrigated once per day and sub-irrigated only twice by pouring a small amount of nutrient solution into their shared drip tray.

If you have a look at the rightmost plant (mini roma) in the above photo you’ll see that it’s lowest leaves are a bit yellow. This may indicate that the capillary mat isn’t supplying sufficient nutrient to the plant or that the nutrient solution is too weak. There could be other reasons but these seemed the most likely. Continue Reading »

The second batches of seeds had yielded healthy looking seedlings in all twelve of the mini plant pots.

Four cherry tomato seedlings had been moved out of the propagator. Their mini pots were placed on their sides to encourage the seedlings to grow stronger stems and to prepare for transplanting.

Six mini pots containing loose leaf lettuce seedlings had been moved into a mini float system and the final two mini pots containing basil seedlings had also been moved out of the propagator.

After a few days of lying on their sides, the cherry tomato seedlings had turned upwards at 90 degrees.

I prepared four small plant pots by placing a small disc of coconut fibre liner in their bases (to prevent growing medium from falling out of the drainage holes) and then half filled the pots with a 50-50 mix of small grade LECA and vermiculite. The tomato seedlings were then tipped out of their mini pots and, being careful not to damage their long stems, placed into the small pots at 180 degrees. Additional 50-50 mix was then added to just below the tops of the small pots.

cherry_tomato_seedlings_in_mini_plant_pots.jpgtransplanted_cherry_tomato_seedlings_in_intermediate_pots.jpg

Continue Reading »